The most useful question to ask before buying a hand tool is not how many pieces come in the box. It is what the tool needs to touch, and what you need that part to do. A pipe wrench, a pliers wrench and a locking clamp can all look like ways to grip something. Their working ends make them useful for different jobs.
This guide walks through the MAXPOWER tools in our catalog using four practical checks: surface, size, access and connection. Those checks help you compare a single tool with a set, recognize a drive-size mismatch and avoid choosing a long handle for a space where it cannot move. Keep the instructions for the tool and the equipment beside you when planning the actual work.
1. Start with the part, not the toolbox
Look closely at the workpiece before opening a product page. Is the outside round, or does it have flat sides for a wrench? Is the finish exposed and easy to mark? Do you need to turn the part, hold it in position, bend a small section or cut wire? Write down the answer in ordinary words. “Hold this sheet edge while I align the second panel” is more useful than “buy strong pliers.”
Then separate the task into movements. You may need one tool to hold a fitting and another to turn the adjoining part. A clamp that is excellent at holding can still block the place where the next tool needs to go. A ratchet can turn a socket repeatedly, while a breaker bar is chosen for a different handle arrangement. Thinking through the sequence makes those distinctions visible before you buy.
For a first repair kit, start with the work you actually repeat. A set of five locking pliers provides several sizes and two jaw families. A fifteen-piece clamping kit adds specialist shapes that make more sense when you regularly work with sheet metal and assemblies. Neither choice is automatically better. The useful set is the one whose pieces solve different problems on your bench.
2. Match the jaw to the surface
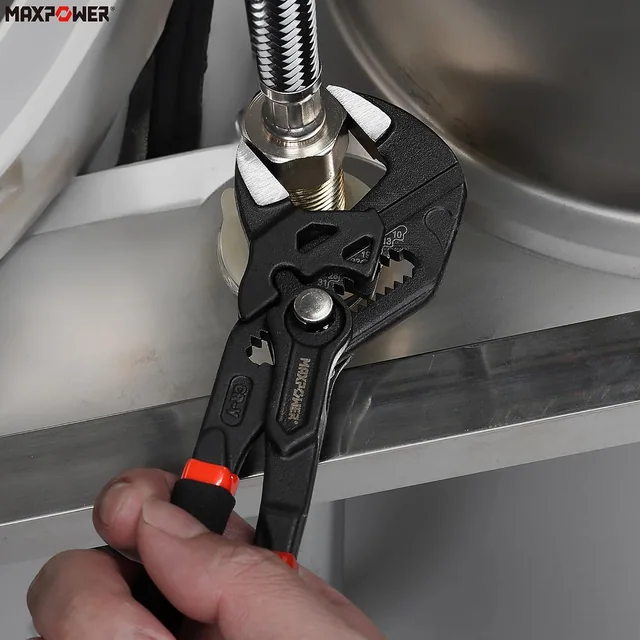
Flat-sided nuts and fittings give a wrench defined faces to sit against. Our 7-inch pliers wrench uses smooth, parallel jaws and a push-button adjustment. Its maximum opening is 1.57 inches, or 40 mm. The handles remain compact, so the tool can be useful where a larger head and handle would feel awkward.
Smooth jaws are still contact surfaces. Dirt caught between the metal faces and a finished fitting can scratch it, and a poor fit can concentrate pressure at an edge. Clean the area and check how the jaws sit. If the fitting is delicate, use the component maker’s recommended method and test any protective approach before loading the tool.
A straight pipe wrench takes a different approach. Its serrated jaws are intended to bite into suitable round metal pipe. That bite is useful on the right surface and undesirable on polished trim. Do not choose a pipe wrench simply because its jaw opens wide enough to surround a nut. The contact shape matters just as much as the opening.
A nylon strap offers another way to meet a rounded part. The strap wraps around the outside instead of placing two metal jaws against it. Our 18-inch strap wrench has a 28.7-inch strap. Consider the wrap, the handle clearance and the component’s instructions together. A soft-looking strap does not make a fragile housing immune to excessive force.
3. Read opening and length as separate measurements
The number in a wrench’s name often describes its overall length, not the largest part that fits between the jaws. Our 14-inch aluminum pipe wrench has a 2-inch opening. The 18-inch model opens to 2.5 inches. Those pairs of numbers describe two different things: the tool you must position and the space its jaws can accept.
Measure the actual place where the jaws will sit. Do not assume the nominal name of a pipe equals the outside diameter of every fitting attached to it. A connector, collar or coupling can have a different outer dimension. Record the measurement you need, then compare it with the published jaw capacity for the exact model.
| Model | Opening | Useful comparison |
|---|---|---|
| 14-inch aluminum | 2 inches | Shorter handle to position |
| 18-inch aluminum | 2.5 inches | Larger opening and longer handle |
Now imagine the handle moving through the space. A nearby wall, cabinet back, frame rail or second pipe may limit the swing. The larger wrench can have sufficient jaw capacity and still be the wrong size for the surroundings. If possible, measure the clearance before placing the order instead of relying on a photograph taken from a convenient angle.
Weight is another separate measurement. Aluminum handles help keep the tool manageable, but handle material alone does not tell you everything about balance or access. Look at the head, adjustment nut and handle shape. The best comparison combines the dimensions with a clear view of the actual tool.
4. Decide what the locking pliers need to hold
Locking pliers make sense when you need the jaws to remain closed on appropriate work without continually squeezing the handles. The adjustment screw sets the fit before the locking action. Choose a jaw profile that makes useful contact rather than trying to compensate for a poor shape by increasing pressure.
Our five-piece set includes curved jaw tools in 5, 7 and 10-inch sizes, plus 6 and 9-inch long nose tools. The curved profiles suit different rounded workpieces. A long nose can reach into a smaller space, but its shape is not a substitute for the broader contact of a larger jaw. Position the part so it is supported by the appropriate section of the tool.
Think about release access as well as gripping access. A tool that can just fit into a gap may leave its release lever against another part. Before applying a firm hold, check that you can reach the control and move the tool away afterwards. This is especially useful when several clamps surround one assembly.
The included roll-up pouch gives the five-piece set a clear storage advantage: each size has a place. Lay out the tools and learn their differences before the first job. If a particular profile is used much more often, keep it easy to reach without leaving the remaining tools loose where their teeth can catch or damage nearby items.
For example, a small bracket with an exposed edge may leave room for a short curved jaw tool. A similar bracket tucked behind a panel may need the reach of a long nose. Photograph both locations and compare the available space with the tool’s head and handle, not just its nominal length. That comparison can reveal why two tools of similar length behave differently in the same repair bag.
5. Choose a clamping kit by profiles, not just piece count
A fabrication kit earns its extra pieces through different ways of meeting an assembly. The fifteen-piece MAXPOWER set combines conventional locking pliers with C-clamps, a sheet metal clamp, a U-shaped clamp and other profiles. Read the contents list with your own joints and workpiece shapes in mind.
A wider sheet metal jaw spreads its hold along more of an edge. A U-shaped profile can leave room around a joint that a conventional straight nose would cover. The pair of eleven-inch C-clamps includes both regular tips and swivel pads. These distinctions are more useful than treating every clamp as another version of the same tool.
Sketch the arrangement if the assembly has several parts. Mark where the pieces need support, where the working operation happens and where the clamp handles will sit. Then compare the relevant gallery pictures. An attractive set photograph shows everything included, but the individual detail images are where you see how a particular profile could fit.
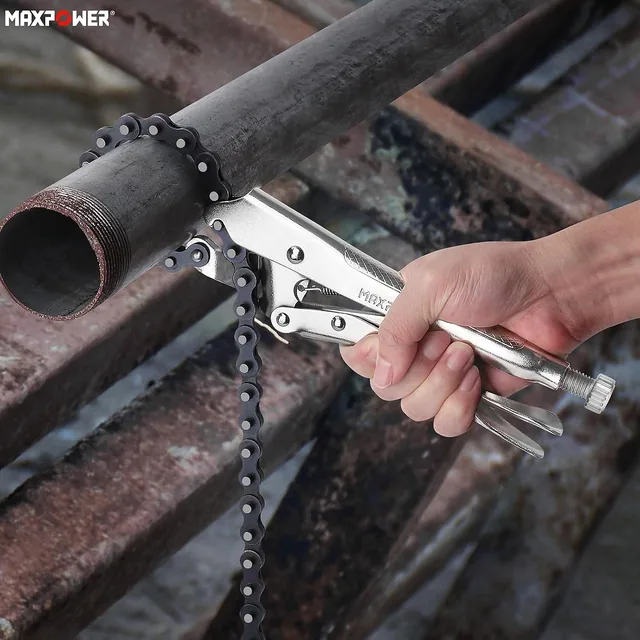
Chain clamps add a different option for irregular shapes. Our two-pack uses 19.7-inch chains with nominal nine-inch locking handles. The flexible chain can follow a profile that flat jaws cannot easily surround. It is still a clamping tool with metal contact points. Do not treat it as a lifting chain, and consider surface marking before choosing it for a finished part.
6. Keep drive size separate from socket size
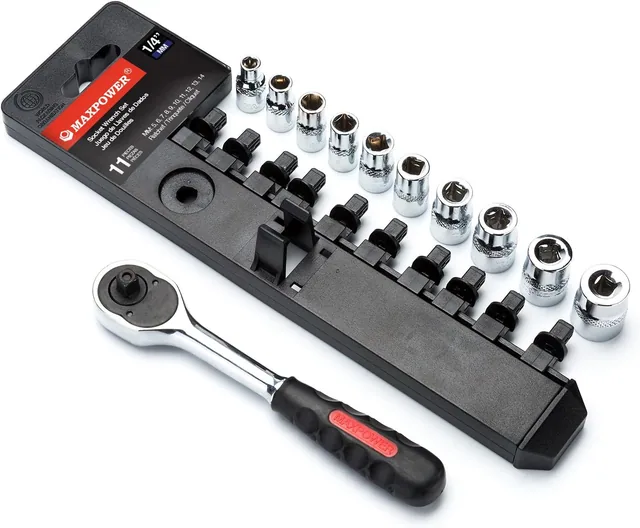
Socket descriptions contain two sizes that refer to different ends. The socket size describes the fastener it meets. The drive size describes the square connection to the handle. A 10 mm socket can be made for more than one drive family, so the fastener measurement does not tell you which ratchet or bar it connects to.
Our eleven-piece metric set includes ten sockets, covering each whole-millimeter size from 5 through 14 mm, plus a reversible ratchet. Its drive is 1/4 inch. The compact rack makes the sequence visible, which helps when identifying an unfamiliar fastener or checking whether a socket has gone missing.
The 24-inch MAXPOWER breaker bar uses a 1/2-inch drive. It does not connect directly to that 1/4-inch socket set. If you are buying both for different jobs, keep the difference in your plan. Do not assume that two products shown in the same tool family are a ready-to-use combination.
Also distinguish a hand-tool socket from one rated for powered impact use. Appearance, finish and the word “steel” do not establish an impact rating. Match the socket and accessories to the intended driver and application using their own instructions. Where a final torque is specified, a breaker bar does not replace the tool needed to measure that torque.
7. Give small parts their own tools
Small pliers are useful when the task depends on a controlled bend or a narrow reach. The eight-piece mini set includes several nose profiles, as well as cutting tools. Its nominal 4.5-inch format is intended for close work such as wire shaping, models and small components. It is not simply a miniature substitute for every larger plier.
Round nose pliers can help form a loop. Flat noses hold a straight section while you shape an adjacent part. A bent nose changes the approach angle, which can be helpful when another component sits directly in front of the work. Compare those shapes with the route your hand and tool need to take.
For a craft project, begin with a spare piece of the same material. Check the marks left by the jaws and how the material responds. This simple trial can reveal whether the profile is too broad, whether a loop forms where expected or whether the surface needs a different handling method. It is more useful than judging a tool only by how it feels when opened and closed.
Keep cutting choices specific to the material and the tool’s rating. Fine craft wire, hard steel wire and cable are different workpieces. Plastic or rubber handle coverings do not by themselves establish electrical insulation. The mini set in this catalog is not offered as a rated insulated tool set.
8. Use the gallery as a second specification sheet
The first product photo usually gives the clearest view of the complete tool or set. Use it to count components and understand the overall shape. Then move through the detail images to inspect the adjustment mechanism, handle, jaws and storage. The photos should answer different questions rather than merely show the same angle repeatedly.
Enlarge a measurement diagram when the opening or handle length matters. Read the unit beside the number. A diagram can show more than one dimension, and the largest printed value may describe a different part of the tool from the one you need to fit. Compare it with the specification table and exact model name.
Application photographs help explain how the working end meets a part. They are illustrations of the product’s use, not proof that your own assembly has the same clearance or material. Look for the contact position and then return to your measurements. Do not use a photo as a substitute for the component manufacturer’s instructions.
On a small screen, open the enlarged view instead of trying to read tiny labels inside the thumbnail. The product pages provide previous and next controls, individual photo buttons and an enlarged view. Keeping these steps separate makes it easier to compare a detail without losing the identity of the selected model.
9. Make inspection part of putting tools away
After a job, take a moment to look at the part of the tool that did the work. Check a jaw’s contact face, the movement of an adjustment screw and the condition of a socket connection. A clean tool is easier to inspect than one covered in grime, and a familiar storage position makes missing pieces more obvious.
Keep the tool’s own care instructions. Different surfaces and mechanisms can call for different treatment, and a lubricant suitable for one moving joint may be unwelcome on the surface you need to grip. Dry tools before storage and keep a strap away from sharp edges that could damage its fibers.
“Select the correct jaw size to avoid slippage.”Canadian Centre for Occupational Health and Safety, Hand Tools: Wrenches
CCOHS also advises against extending a wrench handle with a pipe or striking a wrench that is not intended for striking. Its pliers guidance emphasizes suitable tools, sound condition and appropriate protection from flying fragments. Treat these as general precautions alongside the instructions for your specific task.
If a tool is damaged, set it aside so it cannot be confused with the usable kit. Keep the product name and order information available if you need to ask the original seller about a replacement or part. A photograph of the affected area usually explains the issue more clearly than a broad description such as “the pliers do not work.”
10. Check the exact option before ordering
Finish with a short comparison of the tool you intend to buy and the job you described at the start. Confirm the jaw type, capacity and handle length. For sockets, check both the fastener size and square drive. For a set, read the list of included pieces and note whether the pouch, rack or bag is part of that option.
Keep useful distinctions in your notes. “Fourteen-inch pipe wrench, two-inch opening” is clear. “Small silver wrench” is not. Exact descriptions help when comparing two tabs, discussing the purchase with someone else or checking a delivery after the packaging arrives.
Our price labels identify the last checked amount for the described option. Before completing the purchase, confirm the current price, seller, selected variant, shipping cost and arrival estimate. A product family may offer several lengths or pack sizes on the destination page, so check that its current selection matches your plan.
If the task is still unclear, return to the surface and movement rather than adding more pieces to the kit. Browse MAXPOWER pipe and strap wrenches for pipe work, locking pliers and clamps for holding, or use the tool finder to choose a starting family.